Showing posts with label Tim Holtz Distress Ink. Show all posts

Wednesday, May 17, 2023

Thinking of You card with Die Cut Divas

 Hello Crafty Friends - I am here with a floral card featuring stamps, dies and stencils from Wendy Vecchi and Ranger along with Tim Holtz Stencil with Ranger.

This month our wonderful sponsor is Frantic Stamper! This challenge this month is use the Tic-Tac-Toe board shown below.

Here's my card. I used Flower, Ribbon Bling for my Tic-Tac-Toe. 


***Due to strict new tax collection requirements, they will NO LONGER ship to any country in EUROPE (incl. UK). 


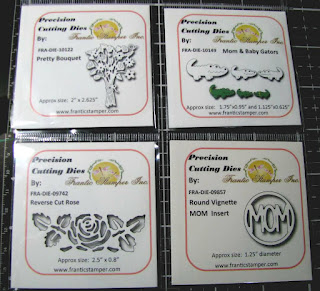
What's the Prize, you say? This set of dies!


Thank you for stopping by the blog today. I hope you found some inspiration!

Thursday, February 13, 2020

Will You Be My First Mate Card with The Coffee Beans

Hello Crafty Friends - I am here with Valentine's Day Card using the
 All at Sea with Love digital stamp set. 
This cute little rowboat was designed by Anne Ingram.

The All at Sea with Love digital stamp set can be purchase via 
The Coffee Bean Stamping Machine located in 
the Facebook group Multi Crafters Craft Cafe
Click photos, albums. Coffee Bean Stamping Machine

All at Sea with Love digital stamp set.

This is the card I created using the All at Sea with Love digital stamp set.
Materials Used:
The Coffee Bean Stamping Machine: All at Sea with Love digital stamp set
Distress Ink: Seedless Preserves
Distress Ink: Tumbles Glass
Distress Ink: Salty Ocean
Distress Ink: Fossilized Amber
Lawn Fawn Dies: Stitched Heart, Cross Stitched Rectangle,
Sun, Cloud, and Ocean Waves
MFT: Cloud Stencil
Spectrum Noir Markers: DP1, DP2, and DP3
Imagine Crafts: Tear It Tape
Foam adhesive
Recollections Brand 110lb Cardstock: White 
Recollections Brand 65lb Cardstock: Purple, Medium Blue, and Yellow
Recollections Brand: Vellum
Accent Ultra Smooth 80lb Cardstock: White

I printed my image and sentiment onto white cardstock. I colored the image with my Spectrum Noir markers. I then used the could stencil with Tumbled Glass ink on the white cardstock. Next, I die cut the panel, add the stitched heart to the background.

Then, I die cut the waves from the blue cardstock and the vellum. 
along with the sun and cloud from yellow and white cardstock. I adhered the waves to the card front panel, the image of the boat. I used foam adhesive on the boat and sentiment.

I colored the heart in with Seedless Preserves ink and adhered the sun and cloud. Next, I adhered the front panel to the purple cardstock and then the card base.

Thank you for stopping by the blog today, I hope you found some inspiration!

Please join in on the fun at The Coffee Bean Challenge Blog and in the
 Facebook group Multi Crafters Craft Cafe

Monday, July 15, 2019

Season's Greeting with White Rose Crafts LLC

Hello Crafty Friends - I am here with a Holiday card for our special promotion Christmas in July!
Image may contain: text

We're featuring different Christmas cards created by the White Rose Crafts LLC Design Team.

I created this fun Christmas in Florida card. 
I do not get a white Christmas - Sometimes we get a cold Christmas but, 
most of the time we're in shorts.


For this card, I used the Kaiser Crafts Summer Splash Stamp Set 
from the July Mediterranean Dreams

I added a few other stamps from Stampendous and Inkadinkado to finish off my scene. Along with some Nuvo Drops for the Christmas lights.


I did some embossing with Glitter Gold Embossing powder. The background was created with some Distress inks and a Cloud Stencil for the sky.

I hope you can give your Mediterranean Dreams Kit stamps another look and create a Christmas card with them. The little cottages can easily become little Winter Cabins.

Materials Used From the Mediterranean Dreams Kit:

Other Materials Used:
Stampendous Stamps: Fran's Seaside Chair Set (Sand with grass)
Inkadinkado Stamps: Coastal Set (Sun, Palm Trees & Lighthouse)
Stampendous Embossing Powder: Jeweled Glitter Gold
Recollections Brand Heavy Weight Cardstock:
 Pink & Light Green
Spectrum Noir Markers: MG1, MG2, GT1, GT2,TB1, TB2, & HB1
Sakura Gelly Roll Pen: Metallic Gold
EK Success Journaling Pen: Black


Thank you for stopping by the blog today - I hope you found some inspiration!

Be sure to tag us White Rose Crafts LLC on social media 
if you create a project with products or kits purchased on the 

Friday, July 13, 2012

Some Layout to share

I've been working on some Cookin' Up Creation challenges. You can see the list of challenge in the earlier post. Here are some of the layouts I created for them.

First one is my current challenge on the Cookin' Up Creation site.
Mary, Mary Quite Contrary : For this challenge we focused on the grow part of the nursery rhyme. I challenge you to grow your embellishments. Make a growing embellishment (well sort of). Bust out those punches, die cuts or machines and paper scraps and follow this easy directions and create you very own growing embellishment.


I made some flowers and butterflies (I made copies my oldest daughter’s favorite book from that time; Harry Potter and Lord of the Rings. Then I misted them and created my embellishments the maroon flower and butterfly HP & green LOTR) for my layout.
This is my layout.

Close up the flowers & butterflies


For this layout I used the following products: 
Cardstock: Black & Cream - DCWV, Pattern Paper: DCWV - Snap Shot stack, Stickers Letters: Recollections Punches: Scallop Circle & Small Butterfly - Fiskars USA, Large Butterfly - McGill, Die Cuts: Label & Black Scroll - Cricut - Lacy Labels, Other: Copied Book Pages from Harry Potter & Lord of The Ring, Brads, homemade misters in Maroon and Leaf Green, Adhesive: Tombow & Glue Dots

This Layout is for the Hey Diddle Diddle Challenge: Use a Crescent shape on your page. 
For this layout I used the following products: 
Cardstock: Dark Blue, Medium Blue, Sunflower & Cream - TLC (top line creations) , Pattern Paper: Lt. Blue (star one) - Starry Blue- The Paper Company, Cream Wrinkle, Cream Plaid, & Medium Blue circles- TLC, Blue Plaid - SBW (Scrapbook Wizard paper stack # 2) & Vellum,  Stickers Letters: Lt Brown & Black Sticky Keys -Monenta, Blue - Thickers, Deco Scissor:- small Scallop-  Fiskars USA l, Die Cut: Moon TLC, Adhesive: Tombow & Glue Dots, Other; Paint chips - Walmart, Paint:  Cream Paint drops - Plaid, Stamps: Chevron & swirls - Michaels ($1 section), Ink: Studio G.

This Layout is for the Humpty Dumpty Challenge : Use a Tiled photo (cut, show the space and re-make your picture) on your page. 
Close up of the title and mister
 Close up of phote tile
my favorite of the 
little cardinal is staring @ the squirrel 
like you better share!

 Close up of my stamped bird and seeds
For this layout I used the following products: 
Base of layout: Back side of a double sided pattern paper - not sure who, Cardstock: Green - Bazzil, Pattern Paper: Pink & Red Dot - MME (My Minds Eye) Red (back of the pink & red dot) - MME, Striped - DCWV - Pet Stack, 

Stickers Letters:Tall Black Thin one - EK Succes, Small Black - Recollections,

 Deco Scissor:- small Scallop - Fiskars USA Punch: Boarder Punch - Fiskars USA, Stamps: Bird & Small Circle - Studio G, Ink:Black - Ranger Archival, Walnut Stain - Tim Holz, Watercolor Pencils: Faber-Castell,  Paint: Paint Drops - Plaid Acrylic paint in Dark Red and Green, Adhesive: Tombow, Aleene's Quick Dry Glue &  Glue Dots, Other; Corrigated Cardboard, Trimmer - Fiskars USA