Tuesday, October 31, 2017

Thankful for You with Simply Stamps

Hello Friends - Annie here once again bringing you a simple and easy card. This card has a bonus bookmark for that special someone you know that loves to read on cool fall days.

For this card I used the Pumpkin and Leaves Craft Stamp - which can be found in the craft stamps section of the site Simply Stamps.


Here is what you will need to create this card with bonus bookmark.


Supplies:
A card base - I used a A4 side opening base (41/4" x 51/2")
A bookmark - I used a piece of card stock measuring 2"x 51/2"
A piece of card stock 4" X 4" for stamping images.
Various Ink - for the background and stamping (see below)
Coloring materials - I used Spectrum Noir Alcohol Markers
Masking paper (or post it)
Washi Tape
Wink of Stella Clear Glitter Pen (optional)
Embellishments (optional)

Instructions:

1. Start with Stamping your Pumpkin and Leaves image on the your bookmark. Then on your mask. Color your image on the bookmark. Cut out your mask and apply it to the stamped & colored image. Next, start creating your backgrounds - I used Distress Oxide Inks in the following colors fossilized Amber, Fire Brick Red & Peeled Paint. In Distress Ink - Spiced Marmalade. I used a sponge tool to apply the ink to both my card front and bookmark. then Sprinkle with some water to create an oxide affect. (optional)


Now remove your mask and set the bookmark aside to dry.


2. Next, on the 4" x 4" card stock stamp 3 Pumpkins and Leaves images. Color with your favorite coloring medium and cut out. 


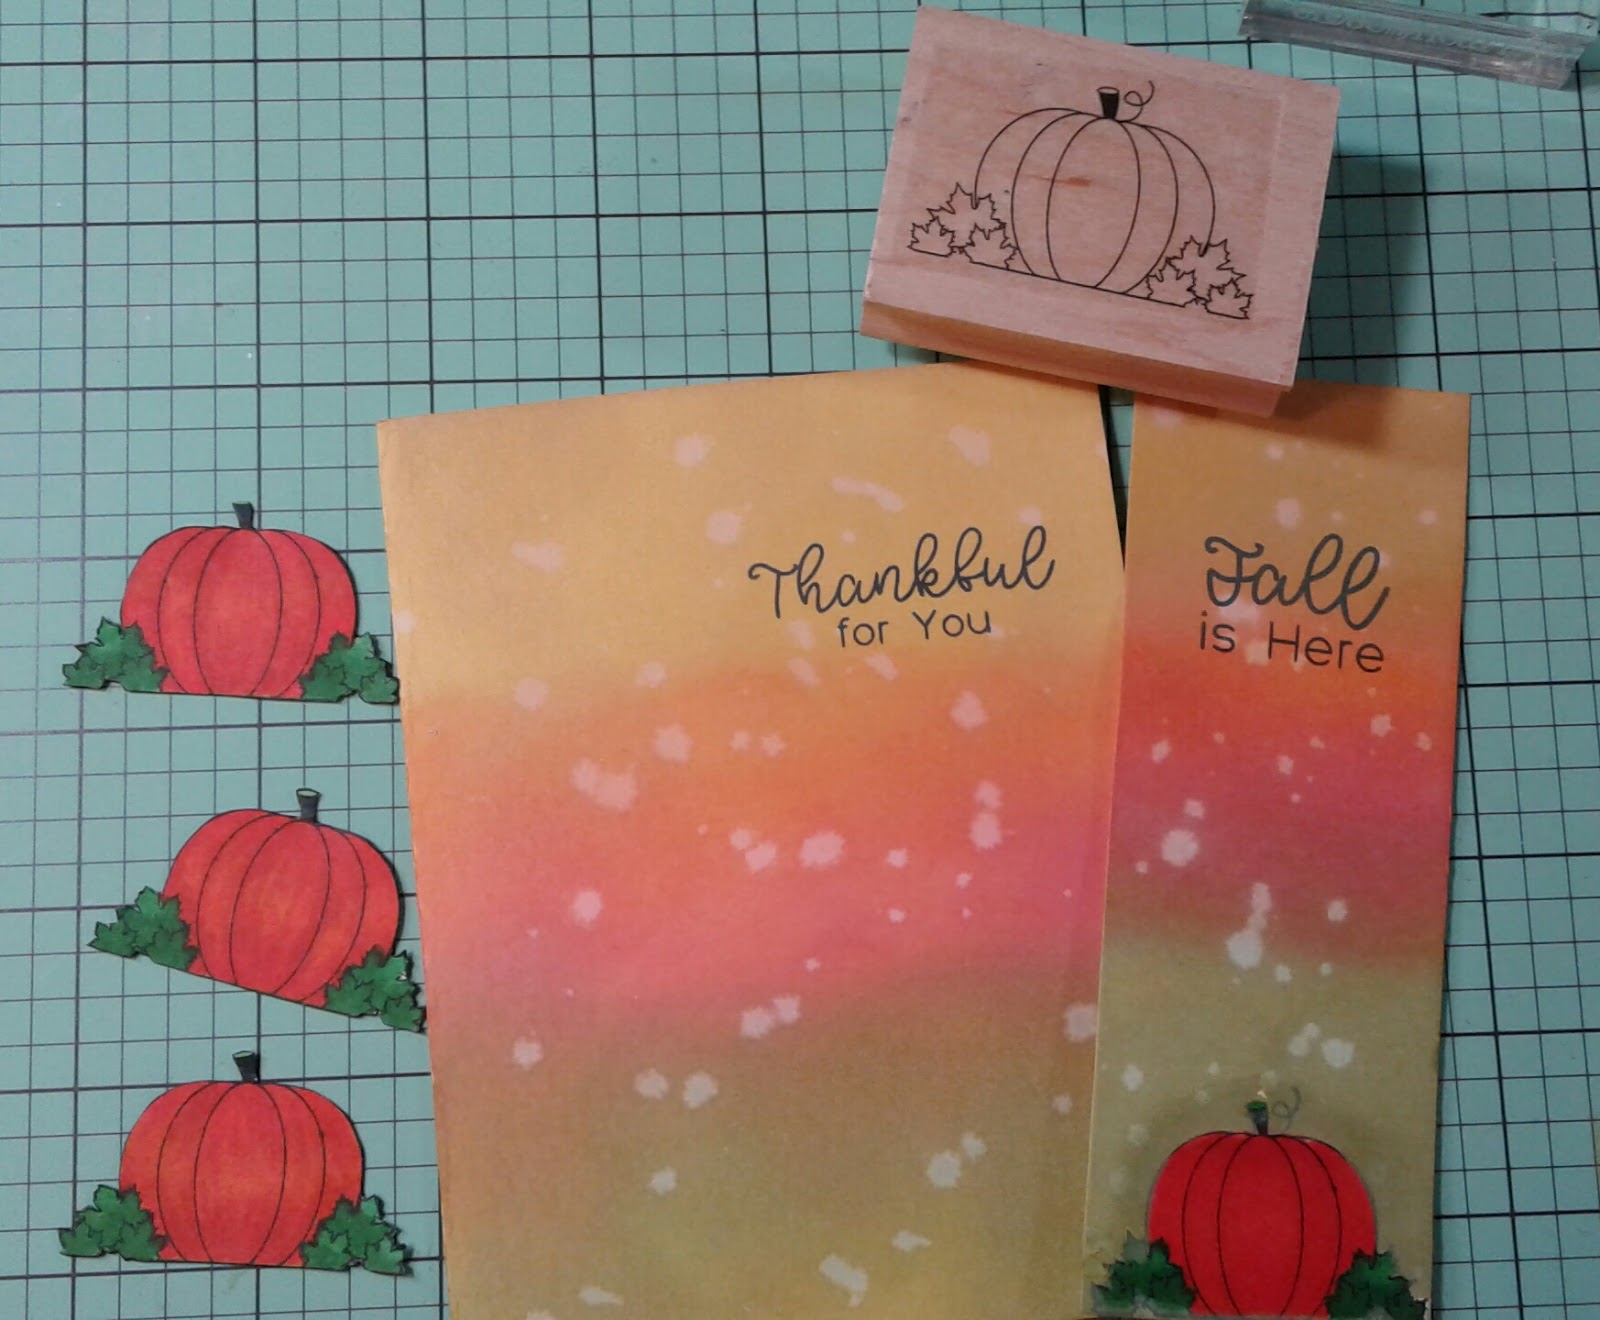
3. Then, Adhere the 3 colored Pumpkin and Leaves to the front of your card. I placed mine at the bottom of the card. I adhered 2 of the Pumpkin and Leaves images flat to the card front and one I used foam adhesive and centered it in front of the other two. Next, stamp your favorite sentiment to the top of the card and bookmark. Note: Simply Stamps carries a variety of Sentiment stamps, Some by theme as well here are some Autumn Sentiments.

4. Apply washi tape to the back of your bookmark; making sure to cover the entire back. Next, Open your card. Then place the bookmark upside down. Then slide it right up against the open card. Apply a strip of washi tape making sure that it is centered over the seem of the bookmark & card.  Now, close over your bookmark, then your card. You can test the bookmark removal if you want it by simply peeling the bookmark off slowly. You can add  embellishments to your card. I added 3simple kraft hearts with a touch of Wink of Stella on each on the front of the card and 1 heart on the bookmark. 


Your card is now finished. You can now give it to that special someone.


Monday, October 23, 2017

Fun-day Friday Challenge with Jo's Scrap Shack


This week over on Jo's Scrap Shack Fun-day Friday Challenge is brought to you by the following sponsor

Digital Delights by Louby Lou

The winner will win a $5 gift card to their online store!

This challenge runs from: 
 Friday, Oct. 20th  12:00AM
  Friday, Oct. 27th    6:00PM
(Eastern time)


This is the card I made for this challenge.

What do you need to do to enter?
Challenge Rules


1. Please post a direct link to your blog post that includes your
challenge entry project, 
using the linky tool below. 


2. Be sure to include a link back to Jo's Scrap Shack and to the challenge post you are entering your project into

3. THREE entries per person are allowed for each challenge and you must post a separate blog post for each entry.

4. For all entries -NO BACK LINKS ACCEPTED- 
The date on your blog post should be dated between the start date & the end date for the challenge you are entering, in order to be eligible for the challenge & prizes

5. You may link up to other challenges but be sure to link back to Jo's Scrap Shack and to the challenge post you are entering 

 * All entries that do not meet the challenge requirements
WILL NOT be eligible for the top 3, any sponsor wins or any random wins by Jo
All random wins will only be mailed within the US and Canada only.

You have until Oct. 27th by 6:00PM (eastern, USA) time to link up.
All winners will be announced during the week of Oct. 30th.

Wednesday, October 18, 2017

Halloween Colors with Crafty Gals Corner


This week on the Crafty Gals Corner Blog - We're doing Halloween Colors Challenge! 

Our sponsor for this week is Oddball Art by Lizzy Love
Oddball Art Stamps


Here is the card I created using Using ~ Tabitha the Wart Hoarder


I had so much fun creating this scary card!
I hope you play along with us on the Crafty Gals Corner Blog.


Please be sure to check out the rest of our simple rules for participating in our challenge HERE.
You have until 12:00 pm CST on October 24, 2017 to play along with us.


Guest Designing for Peek-A-Boo Designs

Hello Creative Friends!

Annie Collins here once again with some more cards using the beautiful stamps.

The first set of cards I created using the

I used the With Love Daisy flowers set for my first card.


This card is an A2 size (4.25"x 5.50"), I created the card panel by using Any Tangerine pattern paper which I layered on to Shimmery Blue card stock. I then colored my image with Copic Markers. Next I applied some Wink of Stella Glitter pen in Clear. I then added the images to the panels and adhered them to the card. I finished off the card with some Gold glitter enamel dots. I added the sentiment to the top of the card layering in on the same papers as the card panel.


For my next card I used the Panda Hugs Set. These little guys just make me smile.


This card is an A2 size (4.25"x 5.50"), I created the card panel by using a die and cutting the three section frame. I also cut some grass from pattern paper. I then backed the frame with blue swirl pattern paper. I then stamp can colored the images. I then fussy cut them and adhered them to the frame. Now, for the sentiment I wanted it to fill the space in the frame so I used die cut letters and alphabet stickers. I redid the sentiment which is just perfect for these to hungry little pandas.


Thank you so very much for stopping by today. Please make sure to visit the Peek-A-Boo Design Store to purchase these wonderful stamp sets.

Monday, October 16, 2017

Skipping Stones' Meet Our New Design Team Blog Hop


Hello - Thank for stopping by.  Let me introduce myself my name is Annie Collins. This is my first term with Skipping Stones Designs - Design Team. I am so honored that I was asked to be a part of the team. 

I have been a  paper crafter for over 20 years now. I have been a crafter in one form or another my entire life. I enjoy the creative process. I live in sunny Florida with my wonderful family. My loving and supportive husband and our 3 amazing children along with our sweet pets - both cats and dogs.

Now, I would like to share my project with you. I created this card using the beautiful I'd Pick You stamp set pictured below.


I first created a watercolor background using Distress Ink in the following colors Tumble Glass, Peacock Feathers, Salty Ocean & Blueprint sketch. I let it dry then sprinkled some Heidi Swapp in Gold & Citron set it a side to dry.

I then colored the image. Die cut the little label for the sentiment, I also cut the plum card stock to back my card front panel. Once the background was completely dry I pierced the card front panel and stitched with gold metal embroidery thread.

Then, I adhered the floral image to the card panel using foam adhesive for some height. finished with some more gold thread, sequins and enamel dots.

Thank you so much for coming by my blog. I hope you visit Skipping Stones Designs Store and purchase some wonderful stamps for your collection. 

I hope that you stop by again and visit me here.

Please be sure to stop by each of the Skipping Stones Designs - Design Team Members Blogs and leave a bit of love on their project. Thanks Enjoy your day!

Debra


Sunday, October 15, 2017

Hello Creative Friends!

I would like to introduce myself,  my name is Annie Collins and I am honored to be Peek-a-boo's Guest Design Team Member for the month of October.  I was so excited to create cards with such  beautiful stamps.

The first set of cards I created using the Madhubani Stamp Set.  I used the Peacock and flowers of the set for my first card.

 
This card is an A2 size (4.25"x 5.50"), I created the card panel by using Distress Ink in Mustard Seed, Ripe Persimmon, Seedless Preserve. Then I sprinkled some Heidi Swapp Color Shine in Gold. While my panel dried I colored the images with Copic Markers; then used a gold gel pen to add some highlights. Once the gel pen was dry I applied a bit of Wink of Stella in clear shimmer to the Peacock. I then mounted the watercolor panel on peacock blue cardstock. I then added the images to the panels and adhered them to the card. I finished off the card with Liquid Pearls in Peacock.


This card is an A2 size (4.25"x 5.50"), I created the card panel by using Distress Ink in Mustard Seed, Ripe Persimmon, Seedless Preserve.  While my panel dried I colored the images with Copic Markers; then used a gold gel pen to add some highlights. I then die cut the word Congratulations from white and black card stock. I then layered and adhered them together. Once the watercolor panel was dry I die cut a circle from it to use as a layer behind the two Elephants. To add a grounding element for the elephants I covered a scrap piece of card stock with some floral washi tape' I then cut fish tails into both ends. I layered the the washi tape on top of the leaves from the stamp set. All the components were then layered on top of black card stock panel. Which was adhered to the card front. I finished the card with Gold shimmer enamel dots.


 For my final card today, I used the Panda Hugs Stamp Set. This set is simply adorable. From the set I used the pandas with balloons. I saw these two love pandas letting their heart take flight.


This card is an A2 size (4.25"x 5.50"), I created the card panel by using Distress Oxide Ink in Broken China and Faded Jeans. I then sprinkled with water. I then ran a few stitch dies (heart, loop & wave) over the panel to create a wind feel. Next, I die cut  the entire panel with a cross-stitch die, I then die cut some white card stock with a cloud die. I colored the balloons with Distress Markers in Mustard Seed, Worn Lipstick, Broken China, Seedless Preserve & Twisted Citron. I then applied some Wink of Stella in Clear Shimmer to all the balloons. I adhered all the components to the card base. I then added the sentiment which I then added the word LOVE (Heidi Swapp stamp) stamp in Distress Oxide Ink Fire Brick. I finished the card with a red enamel heart, a purple epoxy heart and red flat back pearl heart.

Friday, October 13, 2017

Have a Bewitching Halloween -with Sunsational Stamps

Hello Sunny Friends!  

This month we're celebrating Halloween on the Sunsational Stamps Design Team! Each of the Design Team Members will be creating fun Halloween theme projects. I created a card using the Little Witch from Trick Or Treaters Stamps

She has a goody bag and a lot of candy to add to it. I hope you join us for all the Halloween fun!!